Disappearing Act: Will Fleas Just Go Away On Their Own?

Fleas are a common nuisance that pet owners often face. When a flea infestation strikes, it can feel like an uphill battle requiring a lot of hands-on intervention. You might wonder whether fleas will go away on their own. Unfortunately, they will not, and we’re going to delve into why.

Some of the topics we’ll cover include:

  • Why fleas won’t disappear naturally
  • What makes fleas invest your pet and your home in the first place
  • How you can prevent fleas
  • Natural vs. chemical remedies for fleas
  • What to do if you can’t get rid of fleas on your own

Let’s get started so you can get rid of these pests sooner rather than later!

Why Fleas Won’t Just Leave on Their Own

When fleas find a good place to live, namely on your pet and in your home, they’re very unlikely to leave on their own accord. After all, they’re living rent-free, they have plenty to eat, and if you’re not trying to eliminate them, they have a pretty good deal going! They aren’t going to go anywhere.

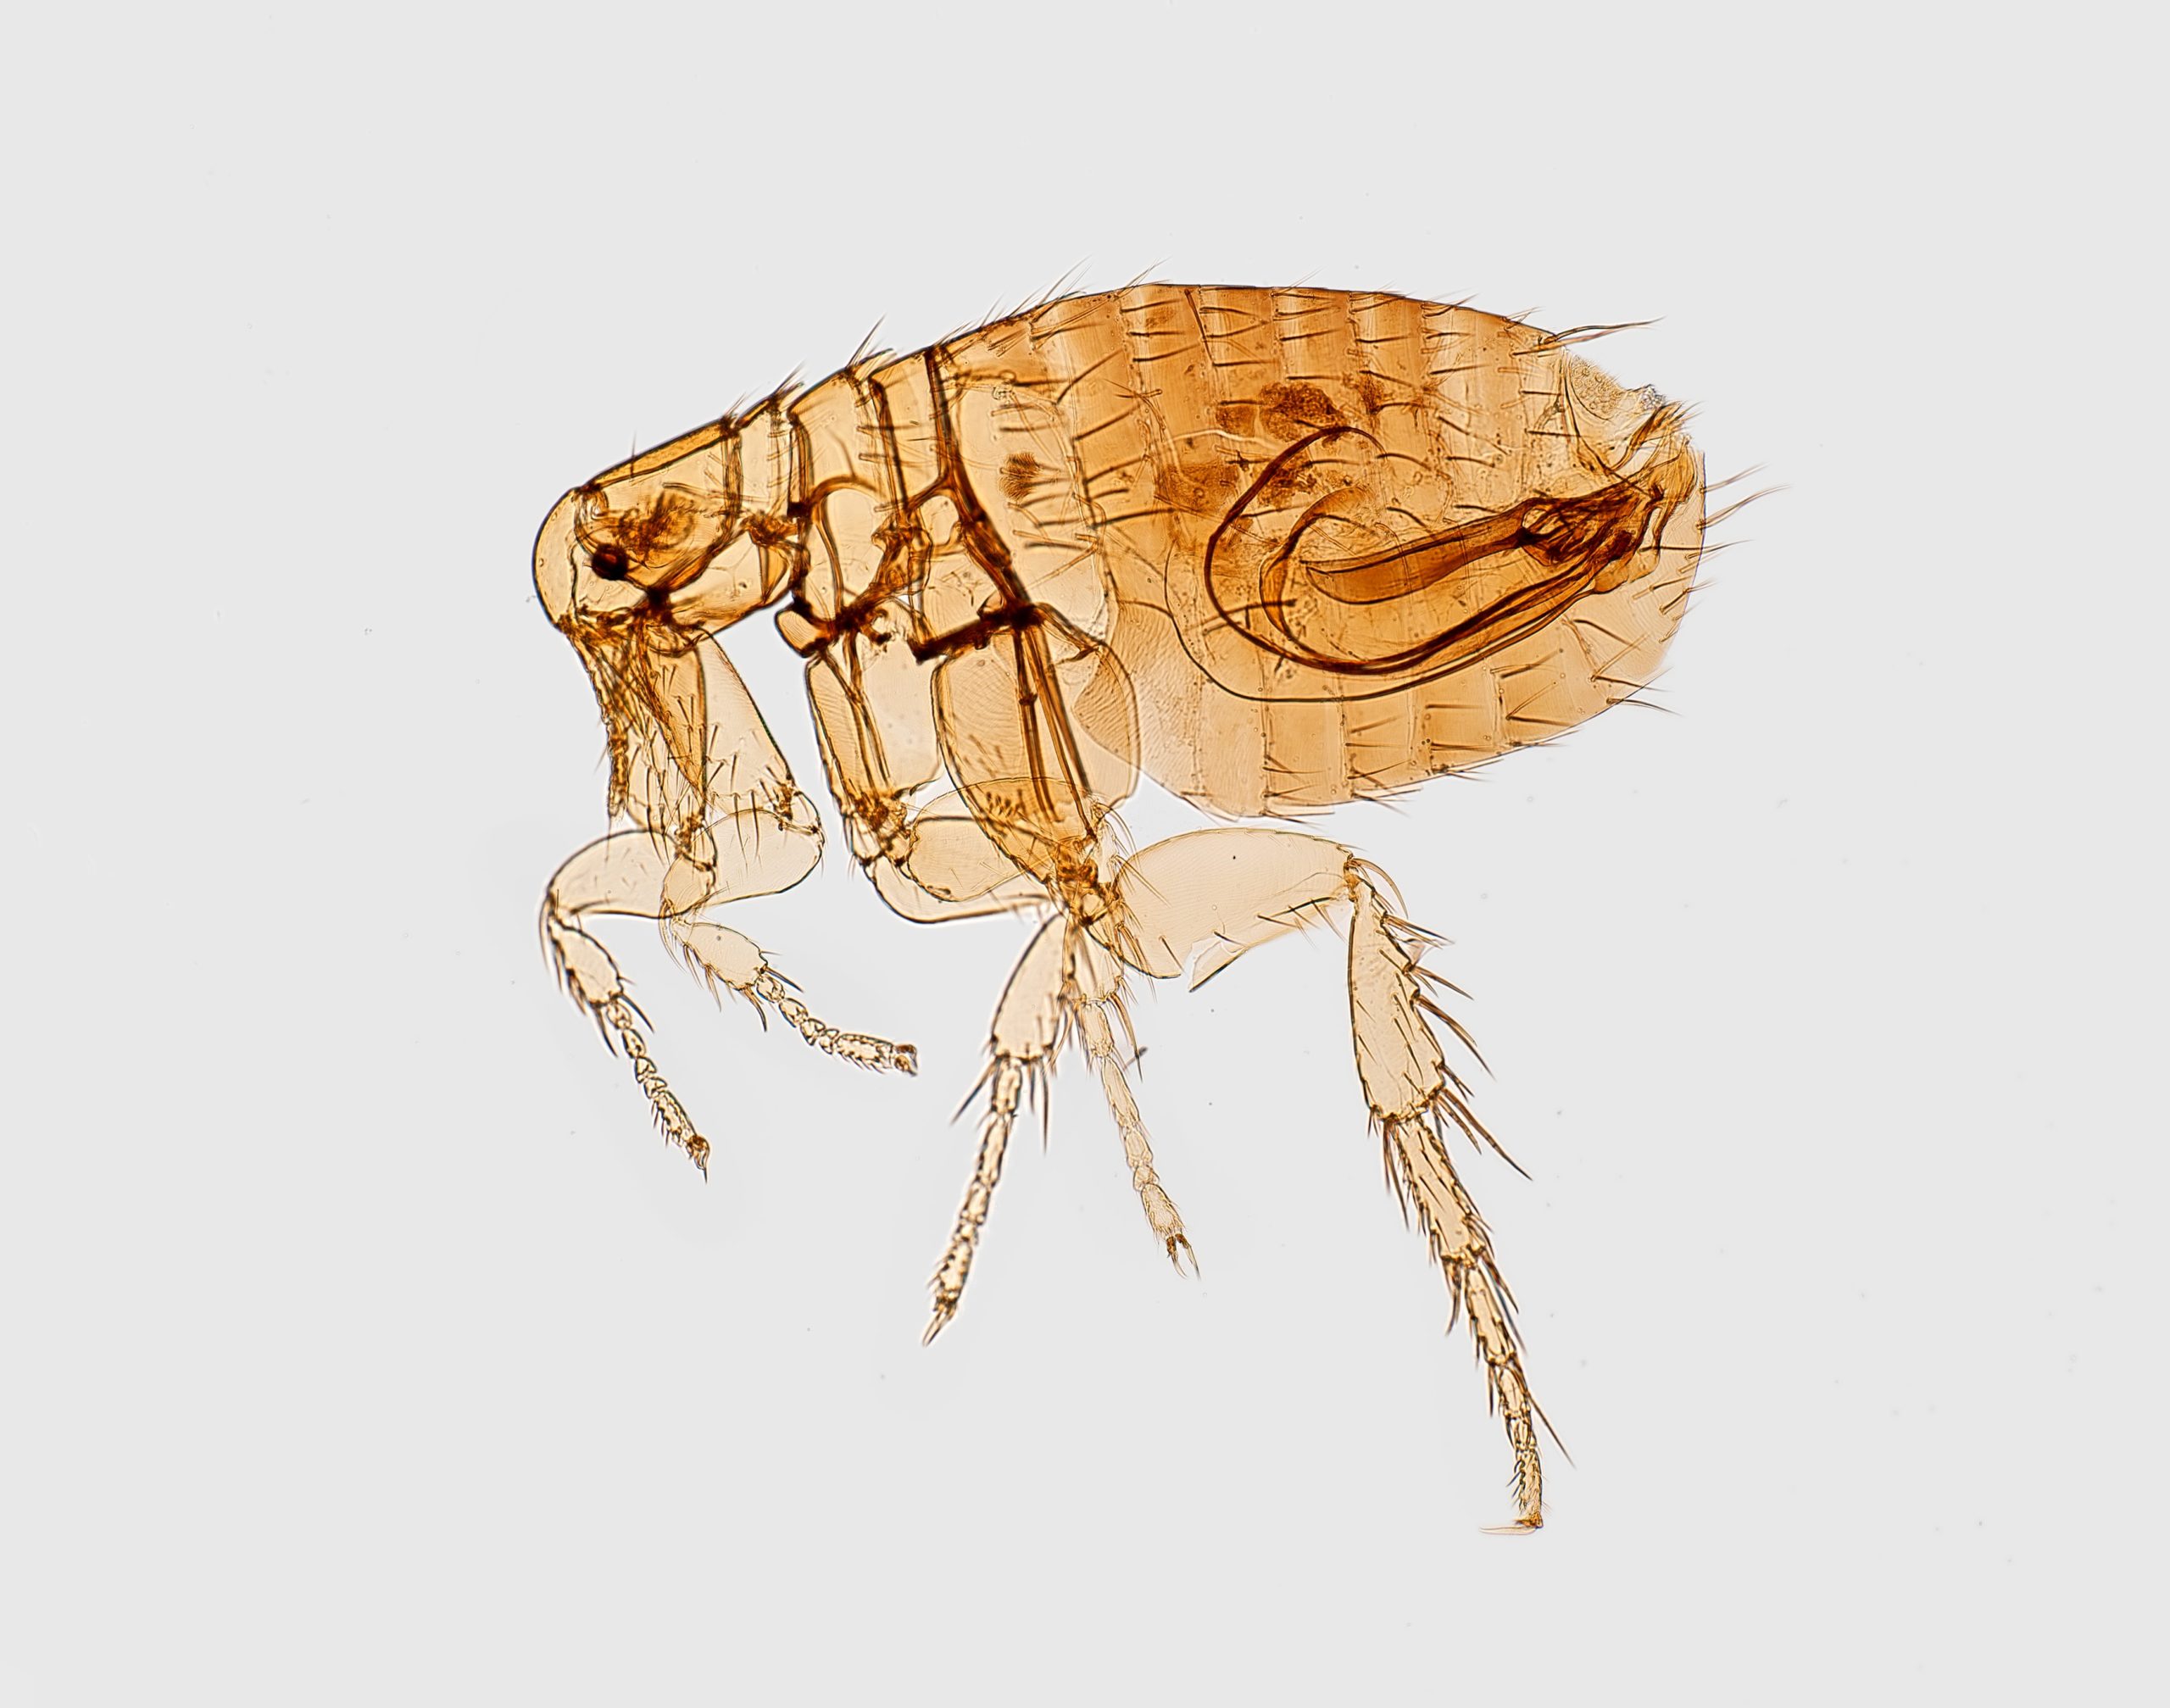
Keep in mind that the flea lifecycle has four stages, so you might not notice much activity when the majority of the leas are in the egg, larva, or pupa stages. Once they’re adults, though, watch out! If you notice a decrease in fleas and you haven’t taken specific steps to exterminate them, be aware that they’re probably just in their dormant stages and haven’t hatched into adulthood yet.

Factors Influencing Flea Infestation

Of course, some pets and homes are more attractive than others when it comes to a flea infestation. If you happen to live in a warmer climate, you’re more likely to get fleas than your colder-climate cousins. Without a cold winter to kill off the insects, they’ll just proliferate year-round. (Unfortunately, even living where it’s snowy won’t kill off all of the critters that are snug as a bug in a rug inside your warm, cozy house.)

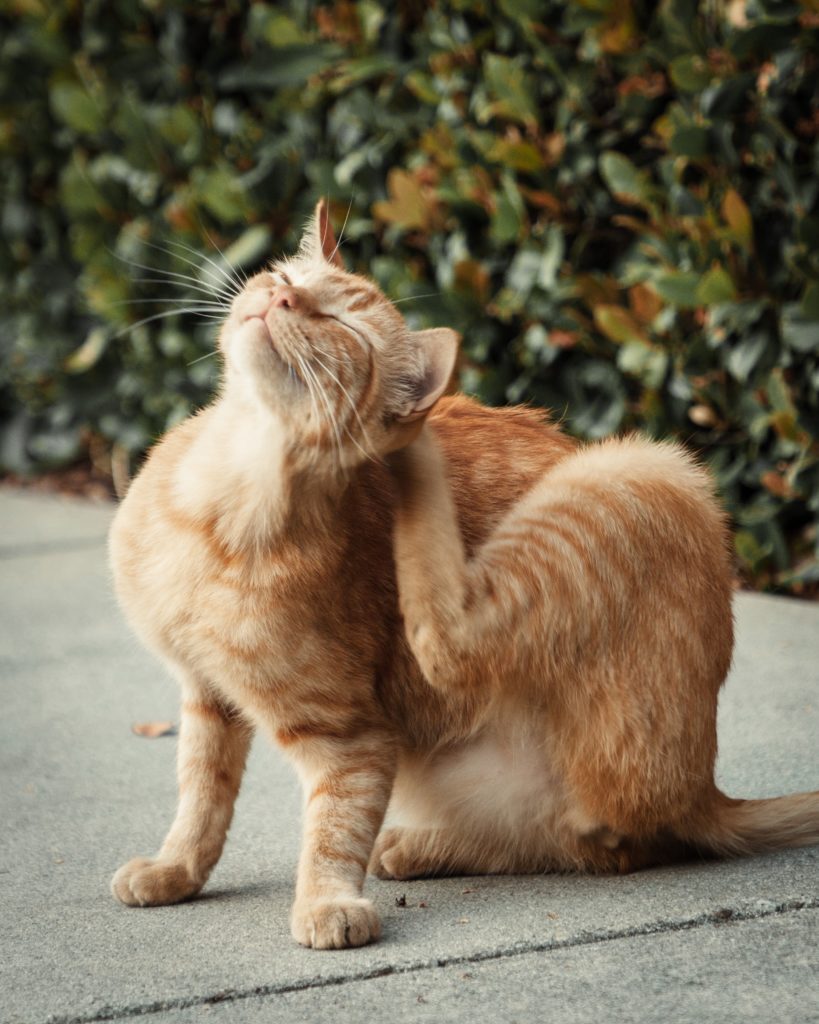
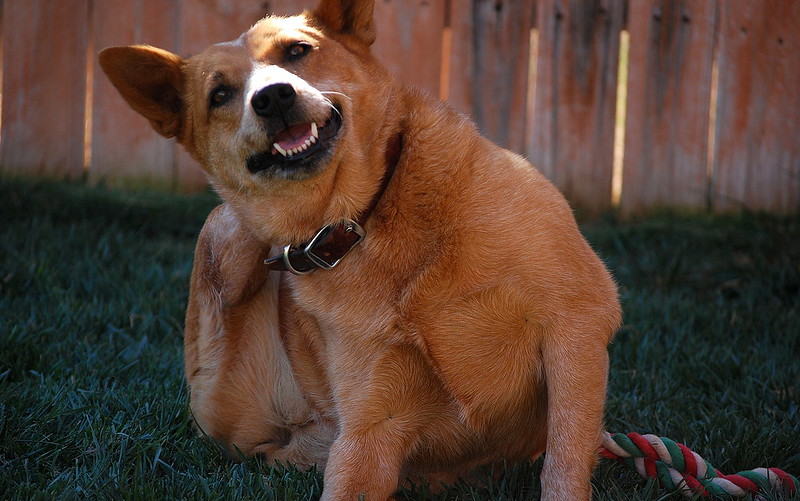
Having pets makes your home a delicious buffet for fleas. They don’t only live on cats and dogs, either; fleas can make themselves at home on pet rodents, birds, and any other warm-blood creatures you have living in your home. The good news is that they won’t live on humans, though they may bite you on occasion.

Finally, a lack of regular cleaning can allow fleas to reproduce unchecked. If you’re not vacuuming frequently, wiping down surfaces, and grooming your pets, nothing is interrupting the flea lifecycle. This isn’t to say that fleas only infest dirty homes, just that they’re more likely to thrive in an environment that isn’t cleaned often.

How to Prevent Fleas

An ounce of prevention is a worth a pound of cure, and there are some things you can do to prevent a flea infestation in the first place. These will also help you keep down the flea population as you battle an infestation:

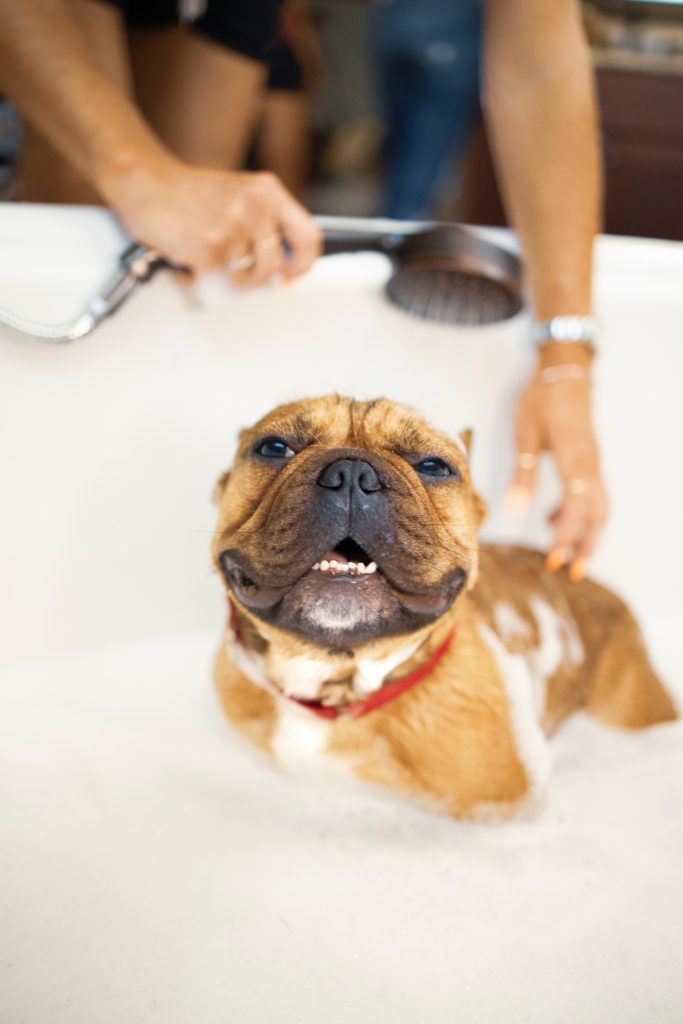
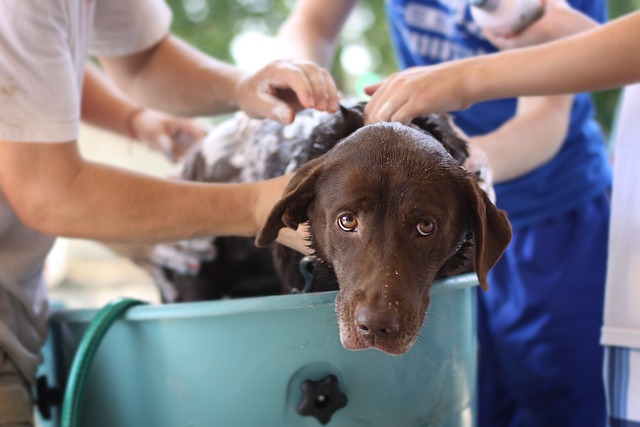
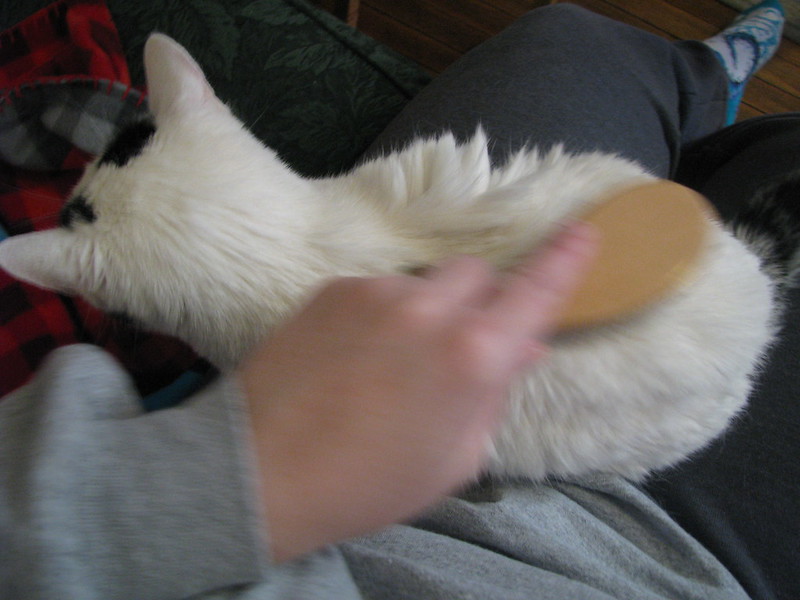
  • Keep your pet flea-free. Preventative medications and other products can go a long way here. Only use products recommended by your vet, however, and never give your pet a product designed for a different species, as it can cause dangerous and even fatal results. Bathing or grooming your pet is another key to keeping them free from fleas.
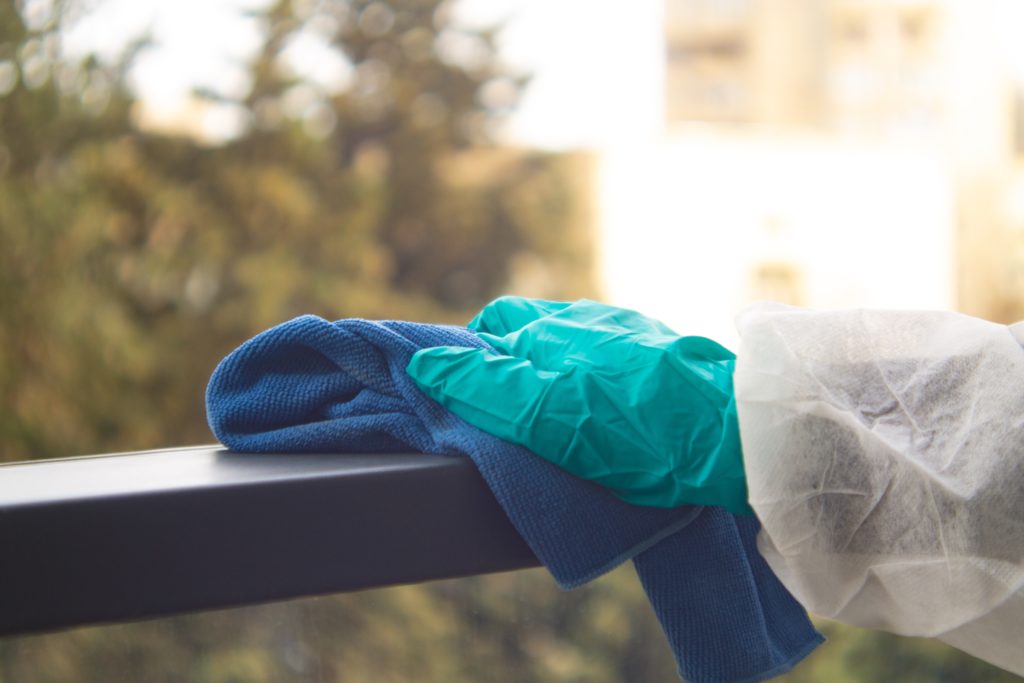
  • Clean your house. You want to physically remove as many fleas and eggs as possible, and you can do this by vacuuming your carpets, upholstery, and anywhere your pet spends a lot of time, such as in and around their bed. Wash blankets your pet uses, and wash your hard-surface floors regularly.
  • Keep your yard tidy. Mowing the grass and picking up fallen fruit can dissuade small animals like rats and rabbits from frequenting your yard. This can cut down on the flea population, since many pets get fleas from wildlife in the yard. They don’t have to encounter the wildlife up close and personal, either: flea eggs falling off of a rabbit can hatch into fleas that will jump on your dog weeks later.

Ways to Eliminate Fleas: Natural and Not

Once you have fleas, it takes a lot more effort to get rid of them than it did to prevent them in the first place. In many cases, it can be done naturally without the use of chemicals. Other times, though, you will need to rely on chemical products.

Natural ways to combat fleas include frequent vacuuming, using Borax or diatomaceous earth first. Sprinkle the powder on your carpets and upholstery, working it in with a broom if needed. Then vacuum several times to remove the powder and the dead fleas. The powder will continue drying out and killing fleas over a period of time, so you’ll need to vacuum each day. In addition, you’ll need to do a lot of laundry, washing all bedding, blankets, couch pillows, and so on, that your pet has access to.

Of course, you’ll also need to wash your pet. You will probably need to use a flea-killing formulation, but again, only use products designed for the species of pet you have. Do not use dog shampoo on cats or vice versa. Very young pets can often be safely washed with blue Dawn dish liquid, but check with your veterinarian.

Chemical treatments can include various flea medications, sprays, powders, and foggers. Talk to your vet before using any products on your pet. Also, read the instructions carefully and take the necessary precautions recommended. For example, you may need to cover food-prep areas in your kitchen before using certain sprays or foggers.

When to Call in the Big Guns

If you have been trying to get rid of fleas and you don’t see a drastic improvement within 2-3 weeks, it’s time to call in the pros. A professional exterminator will have access to tools and chemicals that you don’t, and they know how to use them safely. It’s worth the cost to eliminate a flea problem if you aren’t having luck on your own.

Fleas in Your Follicles: Can Fleas Live in Human Hair?

Fleas are tiny, blood-sucking pests, and if you were to take a look at a cat or dog infested with these critters, you’d see that they’re uncomfortable and itchy. One belief that many people have is that fleas can live in human hair. Is that really the case? The answer is no, fleas don’t live on humans… at least not usually.

Let’s explore the topic a bit more:

  • What types of animals do fleas typically live on?
  • Why do some people believe that fleas live on humans?
  • Are there specific circumstances that can cause fleas to live in human hair?
  • How do humans get bitten by fleas?
  • How can you prevent flea infestations?

Read on to learn more about these pests.

What Types of Animals to Fleas Live On?

Fleas live on the blood of warm-blooded animals, and they will live on mammals or birds. Their bodes are designed to be able to maneuver easily through thick fur or feathers, so they can stay protected and undetected. They feed on the blood of their hosts, and they get to the blood be biting. The bites can cause itching and sometimes allergic reactions.

So, if you have a dog, cat, or pet bird, they can get fleas. Since fleas also live on animals that probably trek through your yard and local parks, such as rodents, raccoons, and rabbits, that’s likely where your dog or cat is most likely to get fleas.

Do Fleas Really Live on Humans?

Fleas don’t like living on humans. Our hair isn’t thick enough to provide good insulation and protection. Also, we wash our hair frequently, so our hair is usually too slippery for them to get a good hold on. The parts of our bodies without thick hair just aren’t conducive for fleas to live on; there’s nowhere to hide, and we’d see them immediately.

Fleas have definite preferences as to the types of animals they infest, and those animals are generally fur-covered mammals and sometimes birds.

Could They Potentially Live on Humans?

While fleas don’t typically live on humans, it’s possible in a few specific circumstances for them to make a home on a human head. If people live in very crowded, unsanitary conditions, they could conceivably experience having fleas living in their hair or on their bodies.

More often, humans will have other types of mites or head lice that they might mistake for fleas. While head lice and fleas both bite, they’re two different creatures.

Why Do Fleas Bite Humans If They Don’t Live on Them?

Humans will get bitten by fleas if there are fleas in the environment. Fleas will live on household pets, and they can also temporarily live in carpeting, bedding, and upholstered furniture. When you walk through an infested carpet, fleas will jump up and bite you. Most of these bites happen on the ankles and feet.

Fleas will also leave your pet temporarily to bite you if you’re nearby. They might jump onto your body to bite, but they won’t continue living there; they’ll go back to your pet or onto the floor or furniture when they’re done eating.

How Can You Prevent Flea Infestations?

While fleas can’t live on your body, they can certainly cause a lot of discomfort. Also, they can and will continue to live on your pets and will cause them itching and maybe allergic reactions.

The best way to deal with this is to prevent a flea infestation in the first place. First, talk to your vet about ways to keep your pets flea-free. This might entail medication or a gel that you apply to their necks each month. Very young animals can’t use these products, so you may need to resort to bathing them regularly.

Keeping your home clean can also help. Vacuum and wash your pet’s bedding regularly.

Outdoors, keep the grass mowed and if you can take steps to prevent bunnies and raccoons from entering (with a fence, perhaps), do that.

The most important thing to do is address any flea infestation promptly. If self-help measures don’t work, call in the professionals to take care of the problem. The last thing you want is a full-blown infestation, which can happen in a matter of weeks.

From Flea Frenzy to Flea-Free: How Long to Get Rid of Fleas From Your Home

You see your dog or cat scratching, or maybe you’ve seen tiny insects jump onto your ankles from the carpet. The bad news is that you have fleas in your home. The good news is that fleas are generally not too hard to get rid of on your own. But how long does it take to get rid of fleas?

The answer is usually less than a month. In fact, most of them will be gone within two weeks. We’re going to tell you the considerations to keep in mind as you defeat your tiny archenemies:

  • Learn about the flea life cycle
  • Find out what to do on day one of your elimination strategy
  • Get to know the measure to take throughout the first week
  • Learn about the follow-up you need during week two
  • Gain momentum and keep on keepin’ on throughout the rest of the month

Okay, are you ready to get started! One, two, flea, let’s go.

The Flea Life Cycle: Understanding the Invisible Enemy

In order to eliminate fleas, it’s helpful to understand their life cycle. Since you’ll generally only be able to see (and be bitten by) adult fleas, you might think that getting rid of them will result in no more fleas, but you still have the eggs, larvae and pupae to contend with.

The first stage of flea life is the egg stage. Eggs don’t all hatch on the same timeline; depending on the living conditions, their incubation might take as little as two days or as long as two weeks. One female flea can lay up to 50 eggs per day. While they’re usually laid on your dog or cat, they can tend to fall off around the house, particularly in places your pet spends a lot of time (such as their bed or crate).

The larval and pupal stages are most likely to go unnoticed. Flea larvae and pupae don’t bite or jump or cause any difficulties. They will be in these stages for weeks to months.

The adult phase, however, is when all of the biting and itching happens. Adult fleas emerge from their pupal cocoons when they detect a host (your pets or, in some cases, you). They feed on blood, which is why they start biting, and they can start reproducing within a day or two of hatching. And the cycle continues.

Day One: Your First Leap Toward Victory

So, you’ve discovered fleas on your dog or cat. Maybe they’ve just been scratching a lot and you have found flea dirt or actual live fleas, or perhaps you’ve experienced fleas jumping from the carpet to your ankles. Once you’re sure you have fleas in your home, you need to take quick action.

The first steps will be to clean and vacuum well. Wash your pet, their bedding, and anywhere else they tend to hang out. Vacuum every carpet and every piece of upholstered furniture. Call your veterinarian and get their advice as to which type of flea treatment is right for your pet. Do not use dog products on cats, or vice versa; while some are geared toward either species, using species-specific products on the wrong kind of pet can make them very ill.

The First Week: The Daily Grind Toward Flea Freedom

The first week of flea treatment is going to require daily persistence. Each day, thoroughly clean and vacuum the floors, carpets, and anything upholstered. Also, use your vacuum tool to get into small corners, such as where the baseboards meet the floor.

Wash your pet’s bedding daily. Yes, it’s a pain, and yes, it’s necessary. Use hot water and the hot dry cycle, or you can hang them out in the sun to dry, if you prefer.

Start using flea traps or insecticides. Use caution, and make sure your pets can’t access the traps and that any sprays or powders you use to eliminate fleas are safe for Rover and Fluffy.

Keep using whatever the vet has told you to use on your pet, following the instructions carefully. Some oral medications are given only once per month, while others are given daily during the treatment period. Some products can be used more often than others. Don’t overdose your pet; read the directions and talk to your vet.

The Second Week: Persistence Pays Off

After a full week has passed, you should notice some improvement. You’re still going to have to keep on vacuuming and doing laundry, and you may need to reapply your pet’s treatment (again, follow the instructions!).

Around this time, you can start testing to see if you still have fleas and to what extent your measures are working. Put a little water on a shallow plate (a white salad plate is perfect for this), and add a bit of dishwashing liquid. Put this on the floor under a nightlight. Turn off all lights at night other than this nightlight. Any adult fleas in the room will be attracted to the light and will fall into the water and drown. Make note whether the number of fleas is decreasing over time.

You’ll want to keep up with the plate trick, treating your pet, and vacuuming regularly for the next two weeks, too.

After One Month: Enjoying Your Flea-Free Victory

By the time a month has passed, you should be flea-free. You’ll still need to remain vigilant, as those initial eggs might be in the larval or pupal stage at this point, and if you haven’t yet vacuumed them up, they could still hatch into adults. But by using a flea preventative on your pet and vacuuming several times per week, you should be able to combat any adult fleas that have managed to survive thus far.

Maintain whatever flea prevention your vet has recommended for your pet, and if the fleas come back soon or you aren’t able to get the situation under control within a few weeks, it might be time to call in the experts. Most of the time, though, within a month, you should be flea-free or nearly there.

The Fast Lane to a Flea-Free Home: Tips to Get Rid of Fleas Fast

Fleas are unwelcome guests that can turn your home into an itchy, uncomfortable problem. Time is of the essence when you want to eliminate these jumpy little critters; if you don’t kill them off quickly, they’ll just multiply and cause even more issues. Here are some of the topics we’ll cover in this primer on how to get rid of fleas fast:

  • How to identify fleas
  • How to clean up as many fleas as you can
  • How to de-flea your pets

Let’s get started so you can eliminate your flea problem ASAP!

Flea Frenzy: Identifying a Flea Infestation

Fleas usually come in on furry pets, like cats and dogs, so the telltale sign that you’ve got fleas in your house is seeing your pets scratching. They might also be biting themselves, chewing at their fur, or grooming themselves excessively.

If you look around your pet’s neck, you might see tiny, dark brown fleas moving quickly through the fur. In addition to the fleas themselves, you might see flea dirt, which is their feces. That’s tiny, gritty black specks that looks a lot like black pepper.

Fleas don’t live on humans, but they’ll certainly take the opportunity to bite humans. Another sign of a flea infestation is small, itchy red bumps. They’re smaller than mosquito bites, and they’re usually found on the ankles, feet, and lower legs, since often the fleas are jumping from the floor onto you to take a bite.

If you have any doubt whether or not you have flea problem, you can set flea traps. Set up a nightlight in an outlet a foot or so above the floor. Place a shallow dish on the floor directly under the nightlight, and fill the dish with soapy water. Shut off all of the lights (except for the nightlight) when you go to bed. The next morning, you’ll be able to see whether fleas were attracted to the light and fell into the water and drowned.

The Great Cleanup: How to De-Flea Your Home

Once you’ve determined that you have fleas, you have two missions: One is to de-flea your home, and the other is to de-flea your pet(s). Let’s talk about your house first, though both have to be done at the same time for it to be effective.

First, vacuum all of the carpets, rugs, and upholstered furniture in your home. You’re going to want to do this a few times. First, simply vacuum. Dump out the canister outdoors into a sealed bag, then put the sealed bag into your outside garbage can.

Then, sprinkle the carpets and furniture with borax, which is in the laundry section of your local grocery store. (Keep your pets and small children out of the area during this process.) Work that into the surfaces with a broom, then vacuum again. Empty the canister outdoors as before.

Now you’re going to need to vacuum several times until all traces of the borax are gone. Again, don’t forget to dump out the canister outside. If you were to leave it inside, you’d just be giving the fleas a comfortable place to breed. You’ll need to vacuum thoroughly every day for at least two weeks. You don’t need to repeat the borax application, however, unless the problem isn’t improving.

Next, wash all of your linens, pet blankets, pet beds, and washable throw rugs on high heat. Anything that can be safely tried should be dried on a high heat setting; otherwise hang it outside in the sun for several hours.

You can also try more in-depth measures like steam-cleaning carpets and upholstered furniture.

Flea-foggers and powders are also options, but follow the directions carefully for cleaning afterward, since these chemicals can be hazardous to your health and to the health of your pets.

Fast Flea Removal: How to Get the Fleas Off of Your Pet

While you’re treating your home, you’ll also need to treat your pet. The way you do this will depend on the type of pet you have as well as his or her age and general health. To be safe, contact your veterinarian, who will advise you as to the best and safest way to address the issue. Here are some strategies you might consider:

  • Give your pet a flea bath. Note that flea bath formulas are made for either dogs or cats much of the time; you cannot use a product for dogs on a cat. Some are made for both types of animal. Read the instructions carefully and don’t use on baby animals.
  • Use blue Dawn dish soap. If you have a young kitten or puppy, flea bath shampoo might not be safe. Instead, try blue Dawn dish liquid, the type you’d use for washing dishes. This will dry out your pet’s skin, so you shouldn’t repeat this more than once per week and shouldn’t do it more than twice total unless your vet recommends otherwise.
  • Consider oral medications. There are both quick-acting flea medications and those that you use each month on a preventative basis. Talk to your vet about which type to use. Remember, only give your pet the type of medication formulated for their species and weight.
  • Avoid flea collars. These are ineffective and have been known to make pets very ill.
  • Treat all of your pet mammals. Even if only one dog or cat is showing signs of fleas, they’ll all get them, even if you keep them separated. If you have rabbits or rodents, talk to your veterinarian about how to best treat them. Reptiles and birds are not affected by fleas, so there’s no need to treat them.

Most of the time, a mild to moderate flea infestation is manageable at home. In some cases, however, the infestation will become severe and a professional exterminator might need to be called in. By identifying the issue quickly and working promptly to remove the fleas from both your home and your pets, you should be able to get rid of fleas within two weeks.

Flushing Them Out: How to Get Rid of Ants in the Bathroom

Ants in the bathroom: Why do they invade this food-free space? It can be frustrating when you’re seeing ant trails in your sink, around the toilet, or along the shower grout. The good news is, you can banish ants from this relatively small area of your home by following a few tips:

  • Keep the bathroom squeaky clean
  • Try natural home remedies
  • Locate and seal off entry points
  • Try ant bait and insecticides
  • Learn when to call in the big guns

Let’s get started so you can enjoy an ant-free lavatory!

Why Ants Are Attracted to the Bathroom

You probably understand why ants tend to congregate on your kitchen counters and pantry floor: There are often crumbs and various food residue. In the bathroom, however, you generally won’t have food particles. So, what’s the deal?

Bathrooms are often warm and damp, which is attractive to ants. They are usually in search of water, and your bathroom provides plenty of it. In addition, items like toothpaste and some scented soaps can be attractive to ants.

Another reason ants enter the bathroom is that access is fairly simple. There are often tiny cracks or gaps around plumbing, and the moisture in a bathroom can warp wooden window sills, leaving tiny entry points. Even if the critters don’t want to stay in the bathroom, it’s often the first place they go when they come into the house.

Maintain a Pristine Space

Maintaining a clean and dry bathroom is going to be your first line of defense against the ant infiltration. If there is no moisture and no tantalizing morsels of toothpaste and such, the ants won’t bother sticking around.

First, wipe down surfaces frequently. This mainly applies to the sink, where you’re using toothpaste, mouthwash, and soaps. Using disinfecting wipes after you use the sink area is a quick and effective way to ensure there’s no residue.

Also, look for any leaks. If there’s a dripping faucet or a pipe with condensation, that’s a water source that could attract ants. Be on the lookout for moisture and eliminate it.

Finally, store personal care products like lotions and toiletries in airtight containers so the fragrances don’t lure in ants.

Locate and Shut Down the Entry Points

While you’re examining your bathroom for things that could be attracting ants, you’ll want to take a look around for potential entry points.

Check all around the windows, doors, and plumbing fixtures for potential gaps and cracks. If you are seeing ant trails, you might be able to discern where they’re coming in. It might be under a baseboard along the floor.

Use silicone caulk to seal these areas. You can run a bead of caulk along the floor where the baseboard or molding touches it, as well as along where the plumbing pipes enter the room from outside the house.

Give DIY Remedies a Shot

There are some natural items you can use to repel ants. This might be enough to discourage the casual six-legged wanderer from meandering into your bathroom, though it might not be enough for a true infestation. Try one or more of the following:

  • Vinegar: You can use vinegar to clean your bathroom; just mix equal parts of water and white vinegar, then add a tablespoon or two of your favorite dishwashing liquid (that you’d use to hand wash dishes, not dishwasher detergent). Shake gently to mix, then use that as an all-purpose cleaner in your bathroom. You can also just spray vinegar water along the areas where ants are coming in.
  • Citrus peels: Peel oranges, grapefruits, or lemons and leave the peels near the entry points. You can also soak them in a bottle of vinegar water, then use that to spray around the bathroom. Ants dislike citrus oils, which are in the peels.
  • Cinnamon: You can sprinkle cinnamon under your sink, on the floor of your linen closet, and in other hidden areas.
  • Peppermint or tea tree oil: These essential oils are good ant repellents. Add a few drops to a spray bottle full of water and spray liberally around the bathroom. Don’t do this if you have pets who spend time in the room, though, as they’re not pet-friendly.

Visit Your Local Hardware Store for Ammunition

If natural remedies aren’t enough, you can go to your local hardware store (or grocery or discount store, in most cases) to get more ammo to use against the ants.

Ant bait stations are good to use near where the ants tend to hang out. You can also put them near entry points, if you can find them. These stations contain bait, which the ants will carry back to their nests. Over time, the other ants, including the queen, will eat the poison, and that will eliminate the colony. Once you start using ant bait stations, don’t kill ants that you see in the vicinity, as you want to let them carry the bait back to the nest.

Insecticides are another option. You can spray the ant killer in areas where you’re seeing ants, and it should kill them on contact. This is a less effective option than using ant bait stations, though. Also, they can be dangerous to use around family members and pets, so be sure to read the instructions carefully.

Know When It’s Time to Consult With the Experts

If you’re having issues in various rooms of the home, it’s best to contact a professional exterminator. Also, if you’ve been trying with DIY methods and store-bought solutions and you’re still seeing ants, a pest control expert will have stronger and more effective tools and methods to deal with the infestation.

You will be able to defeat ants in your bathroom. It just takes some patience, a good bit of cleaning and upkeep, and maybe some products or a professional.

Haunting No More: How to Get Rid of Ghost Ants

Tiny ghost ants might not be as creepy as real ghosts, but they are eerie little visitors. Ghost ants don’t behave exactly the same as other types of ants, which can make them difficult to track down and kill. No worries, though, we have the guide you need to get rid of ghost ants and reclaim your home once again.

The steps include:

  • Identifying Ghost Ants
  • Maintaining Cleanliness
  • Sealing Entry Points
  • Using Natural Repellents
  • Luring Them With Ant Baits
  • Calling for Professional Help

Let’s get started and exorcise these tiny phantoms.

Unmask the Problem by Identifying the Species

Ghost ants have some unique characteristics that makes it fairly easy to distinguish them from their less ghostlike counterparts.

First, these are small ants, measuring less than 2mm in length. Their heads are dark, like any ant, but their abdomens are pale, almost translucent. This gives them the ghostly appearance that lends well to their name.

Another difference is the way they move. While most ants march along well-defined scent trails and can be followed to their nests, ghost ants just run around sporadically. It can be difficult to see where they came in or where they’re going because they move around in what seems like a random pattern.

Finally, ghost ants create multiple nesting sites rather than one big one. This is an issue because if you manage to track down and eliminate one, chances are good that there’s another one hiding elsewhere in or near your home. This makes extermination a bit of a challenge.

Ward Off the Spirits With Cleanliness

Prevention is one key to keeping ghost ants at bay. Keep your home clean and free from crumbs, sticky spills, open packages, and other things that will entice ants.

When you clean your kitchen after meals, be sure to wipe down surfaces well, particularly if anything has spilled. Sweep or vacuum and mop regularly. In your pantry and cabinets, make sure food is in airtight containers.

In short, anything you can do it make it less likely the ants will find delectable morsels to eat will make your home less hospitable to these little creepers.

Close the Portals and Seal Entry Points

It can be difficult to see where ghost ants are getting into your home because they don’t march in lines to entry and exit points. That being said, you can still take some steps to seal off spots where they might be getting in.

Look for cracks and crevices on the outside of your home. Make sure the doors and windows are closing tightly. There might also be holes where cables or plumbing enter the home or gaps around vents that you can seal off.

Some of the items you can use to seal entry points include caulk, weather stripping around windows, and door sweeps under doors.

Use Mystical Aromas to Repel Ants

Keeping the ants out can also be done with natural repellents. If the ghost ants don’t like the way your home smells, don’t be offended; be glad, because they’ll probably choose not to enter.

Some repellents that are known to be distasteful to ghost ants include

  • Peppermint oil
  • Vinegar
  • Citrus peels
  • Cinnamon

You can apply these substances to areas prone to ghost ants. Also, putting them near windows and doors can make the ants turn around while still outside and choose another home to infiltrate.

Enchant the Pests With Bait Traps

Of course, trying to convince the ants to stay away is easier said than done, in some cases. You might need to resort to bait traps to kill the colony. Ghost ants, like other ants, share food with their queen and fellow workers and soldiers. If you can get them to take poisoned bait, they’ll share the love, causing the colony to die out.

Commercially available ant baits are your best bet, since they’ll attract the ants and will also kill them slowly enough to allow them to carry food back to their nests. You don’t want to kill them off before they have a chance to go home.

Remember, don’t kill ants that you see once you put the baits down, as this will hamper your efforts to wipe out the colony. Just put the baits in high traffic areas (not near human food, though), and wait. It will probably take a few days or even up to a week to see a difference, so you’ll need to be patient.

Call in the Ghostbusters As Needed

If your DIY and self-help methods just aren’t curing your ghost ant infestation, you’ll want to consider calling in the pros. Professional exterminators have more treatments and ways to find hidden nests. They’ll also often guarantee their work and will come back if you continue to see ants after treatment.

Ghost ants can be a challenge to eradicate, but it can be done. It just takes time, patience, some cleaning, and a few items you might have around your house already. If none of that works, call in the professionals, and you’ll be ant-free in no time.

Driving Ants Away: How to Get Rid of Ants in the Car

Getting ants in the car can be a common issue, particularly during the summer. A few ants can quickly turn into an infestation, and that makes your vehicle not only uncomfortable but also potentially dangerous. After all, swatting at ants while driving is very distracting.

Here are some of the steps you might take in order to get rid of ants in the car:

  • Identify the source of the ants
  • Clean out the car thoroughly
  • Try natural ant repellents
  • Seal entry points
  • Try using traps
  • Get professional help
  • Keep the car maintained

Ants on the Move: Identifying Entry Points

Since ants are so tiny, their entry points often are, too. Identifying where the critters are getting in is the first step in your mission to banish them from your car. After all, even if you can kill the ants in your car currently, if you don’t thwart their access, more ants will simply move in.

Begin the search by inspecting the windows and doors for gaps, cracks, and compromised seals. Then check out the seams and vents. Use a flashlight to see if you can detect signs of ants using these areas as an entry point. If you spot ants inside the car, watch them for a while to see if you figure out where their scent trails are. This might take some time.

Once you have identified the entry points, use automotive caulk to close off any openings. Also, replace any damaged or worn weather stripping while you’re at it, since ants can get in via these gaps.

Crumbs and Creepy Crawlers: Clean the Car Thoroughly

Once you’ve eliminated any compromised areas, it’s time to get down to the nitty-gritty and clean out your car. Remove everything from the vehicle, including from the trunk and glove compartment, then thoroughly vacuum. Remove the floor mats, shake them out, and vacuum them, too. Pay attention to any crevices where crumbs might accumulate, particularly in the seats.

Move the seats forward and backward to reach the areas underneath them. Also, empty out the console and cup holders. Wipe them down with a damp cloth or automotive wipes to remove any sticky residue from spilled or leaked drinks.

Finally, use a damp microfiber cloth to wipe down the dashboard, steering wheel, and control panels. You might be surprised by the amount of grime you find, but ants won’t be. That’s part of why they’re attracted to cars in the first place.

Natural No-Entry Signs: Repellents to Try

Once everything is sparkling clean, consider using some natural ant repellents in the car. Keep in mind than once you close up the car and leave it parked, particularly on warm days, the scent of anything you are using will become magnified. So, only use scents you and your family members aren’t sensitive to.

Some to try include peppermint oil, cinnamon, tea tree oil, citrus essential oils, and vinegar. Any or all of these will tend to make ants turn around and say “never mind,” even if they’ve found an entry point to your car that you’ve overlooked.

Before using any essential oils, be sure to dilute them well with water or a carrier oil. Also, plan to refresh the scents periodically, since they – and their efficacy – will fade over time.

Baited Roadblocks: Let the Ants Do the Dirty Work

In addition to trying to repel ants, you should try using bait traps. These will lure ants in with a delicious (and deadly) treat waiting for them. The ants will take the morsels back to the nest, where they’ll kill the queen and the rest of the colony.

Whichever type you want to use, read the packaging to ensure it’s safe for the confined environment of your car. They should be rated for indoor use. Place the bait traps in area where ants will tend to be active. These might include under the seats and in the cup holders. Of course, make sure children and pets won’t be able to get to them.

Monitor the bait traps to make sure they’re being used by the ants. If the bait supply is dwindling, replace them. You will need to be patient, as it does take some time for the ants to find the bait and for the rest of the colony to consume it and die.

Roadside Rescue: Calling in the Experts

If self-help measures aren’t working and you’re finding that you still have a lot of ants in your car or if you have fire ants or another biting species, it’s time to call in the pros. Professional pest control services are ready with the expertise, tools, and techniques needed to tackle your ant problem.

Your exterminator will be able to assess the situation and come up with a treatment plan. They’ll create a long-term solution, and they’ll also give you advice for DIY follow-up so you can keep your car free from creepy crawlies.

Vigilance Behind the Wheel: Maintaining Your Ant-Free Ride

Whether you were able to ban the ants on your own or you relied on a professional service, your infestation will, at some point, be under control. At that point, you’ll need to take steps to maintain an ant-free environment in your vehicle.

Create a consistent cleaning routine. Make it a habit to wipe down surfaces and vacuum on a regular basis. This will both keep ants at bay and also give you a chance to inspect for signs of ants so you can catch any new infestation at the earliest point possible.

Don’t eat meals or snacks in your car, and only drink water. That’s the easiest way to keep ants out, but it also might not be the most realistic way. If you must eat in the car, be sure to dispose of wrappers and trash immediately. Also, plan to vacuum up any crumbs as quickly as you can, particularly if you have children or if you’ve spilled anything. Wipe out cupholders with wipes to remove traces of spilled beverages.

Continue using natural repellents to discourage ants from entering, and always keep your windows closed when you’re parked.

Finally, just stay vigilant. Take the time to consciously look for ants. Teach the rest of your family to also be aware and to let you know right away if they see ants or if they’ve dropped crumbs or food. By following these tips, you can keep your car ant-free and save yourself a lot of hassle.

Sweet Solutions: How to Kill Sugar Ants and Eradicate Them From Your Home

Sugar ants: Nobody wants to see them making their trails across the floor, counter, dining room table, and in the pantry, but they’re a common occurrence. The good news is that there are ways to prevent these tiny creatures from entering, and if they’re already there, you can use a variety of methods to get rid of them. In this guide to killing sugar ants, you’ll learn about:

  • The signs of infestation
  • How to keep sugar ants out of the home
  • Natural remedies for sugar ants
  • Store-bought solutions for sugar ants
  • Professional extermination for sugar ants
  • Maintaining a pest-free home

Let’s get down to business as we discover how to get these annoying critters out of the home once and for all.

Trail of Trouble: Recognizing Sugar Ant Infestations

Sugar ants may be tiny, but they’re relentless, and a few little wanderers can quickly spiral into a full infestation in no time at all. Identifying the signs of a sugar ant infestation allows you to get to the root of the problem quickly so you can hopefully eliminate them for good.

Here are some signs you might have a sugar ant problem:

  • Seeing sugar ants. Sugar ants are small, up to 3 mm in length but often even smaller. They’re brown to black in color, and their middles are often (but not always) lighter. If you’re seeing larger ants in your home, they’re likely not sugar ants.
  • Seeing ant trails. The ants go marching two by two, or three by three, or four by four… The main thing is that sugar ants make trails winding along the edges of your rooms, across the walls, and maybe along your countertops. These are the worker ants that leave scent trails for each other to follow. The trails will lead to food sources and also back to their nest.
  • Seeing small mounds or nests. Sugar ant nests look like a small mound of dirt with a hole in the middle. The hole is their front door and the way they access the nest. The nests will usually be outside, but sometimes they’ll be inside your walls.
  • Smelling a fermented odor. Only some people can smell ants, and they often describe it as similar to rotting fruit or old cheese. The smell comes from ants that have been crushed, and smelling it in your house can mean you have an ant problem.

Ant-Proofing 101: Keeping Sugar Ants at Bay

Sugar ants are attracted to sugar and other foods. They aren’t super picky; they’ll pick up any crumbs they can find, particularly those from breads, cakes, and other carbs. The best way to keep ants out of your home is to not have food laying around where they can get to it. If there’s no food supply, these opportunistic creatures will wander out the way they came in, and they won’t alert their colony members of the all-you-can-eat buffet, so there will be no infestation.

Keeping out the explorers in the first place can begin with sealing potential entry points. Check for gaps and cracks around windows and doors, and make sure the bottom of your doors are sealed so they don’t walk in underneath. Of course, ants are extremely tiny, so if they really want to find a way in, they’ll likely find spaces you never even saw. You can also try some natural remedies.

Ant Anarchy: Natural Ways to Repel Sugar Ants

There are lots of ways to repel ants from coming in. Many of them are completely harmless to humans, so they’re a good place to start.

First is vinegar. It can act as an all-purpose cleaner, and it can also disrupt ants by taking away their scent trails. If they can’t detect their trails, they generally won’t come inside. You can spray entry points with vinegar, and you should also use it to wipe down any surfaces where you’ve found ants and trails.

A heavy line of chalk drawn across your windowsills and door thresholds (on the outside) can deter ants from entering. They don’t like to walk through chalk, so this will often cause them to turn around and go in the opposite direction.

Some essential oils will also deter ants. These include peppermint oil, cinnamon oil, and citrus oil. You can also sprinkle cinnamon across entryways and in windowsills to prevent ants from entering. Be aware that essential oils should be diluted and can pose a danger to children or pets.

Finally, diatomaceous earth is a powder that can dehydrate ants by damaging their exoskeletons. Sprinkling that around will kill sugar ants before they get very far into your home.

Ant Assault: Choosing and Using Store-Bought Ant Control

If you get to the point where you see a lot of ants or you’re getting them in your food packages, it’s time to take the offense rather than the defense. At this point, you might need to rely on store-bought ant control products. There are a variety of them available, including sprays, traps, and baits.

When it comes to sugar ants, baits are very effective. Set them up on your counters and in corners where you’ve seen trails. The ants will go into them, gather the poison, and bring it back to the nest. In this way, they’ll end up participating in their own demise by bringing what they think is food back to the soldier ants and queen. Just be sure to read the directions and repeat as instructed for the best results.

Calling in the Calvary: When to Bring in Professional Pest Control

Many times, DIY methods will work pretty well, but sometimes, they won’t be enough to eliminate ants. Or, the ants might be eradicated but manage to come back. This is often because the treatment method was enough to repel or kill a good portion of the colony but not the whole thing. At this point, it might be time to call in the pros.

A professional pest control company has more tools, more knowledge, and more experience, so they’ll be able to identify the source of the infestation and know exactly how to get it out of there. You might need follow-up visits; some companies will ask you to have them come back monthly or quarterly for some period of time.

As long as you’re keeping up your end of the contract, many of these services have guarantees that you won’t see live ants for a set time period. If you do, they may come back to treat the home again at no charge. Get the details from the specific company you’re considering.

Ant-Free Zone: Keeping Your Home Free From Sugar Ants

Once you’ve tackled the sugar ant infestation, it’s not over: You still need to maintain your ant-free status quo. You’ll need to regularly inspect areas where you’ve seen ants before to make sure they’re not coming back in for a curtain call. You should also follow preventative measures such as keeping food sealed, eliminating any standing water, and regularly wiping off counters, sweeping, and vacuuming.

Sugar ants are persistent, but you can reclaim your home. Be willing to stay proactive, keep your house as clean as possible, seal off entry points, store food properly, and use some DIY natural repellents to keep ants at bay. If you do see tiny insects coming back into the home, you can jump quickly to your store-bought methods or call the exterminator back. You’ve got this!

Tiny Lives, Surprising Longevity: How Long Do Ants Live?

Did you know that some ants can live for years, while others can live for multiple years? There’s not one solid answer to “how long do ants live?” because different species and castes have different lifespans. In addition, environmental factors play a part. If you’re interested in the lifespan of ants, here are some topics you might be curious about:

  • The development phases of ants
  • The lifespans of worker and warrior ants
  • How long the queen ant lives
  • Different factors that affect longevity of ants

Let’s learn more about these fascinating creatures and how long they live.

The Developmental Phases of an Ant’s Life

Ants go through four distinct phases of life, and it all starts when the queen ant, who is the central reproducing female of the colony, lays eggs. These are tiny and oval-shaped, and they’re well-protected by the worker ants assigned to the nursery. This phase can last between a few days to a few weeks, depending on the species, and when the egg is ready, it hatch into a larva.

Ant larvae are baby ants, and they don’t look much like ants at all. The worker ants continue to care for them by regurgitating their food to feed them. Worker ants will also scavenge for food for these quickly growing babies. As they grow, the larvae will shed their skins, or molt. This phase lasts only about a week, sometimes two, depending on the species.

When they’ve grown enough, these larvae will turn into pupas. They transform into a cocoon-like structure, much as a caterpillar does before it turns into a butterfly. They’ll remain in this passive pupal stage for between one week and one month, and when they’re ready to emerge, they’ll be fully adult ants.

How Long the Different Castes Live

During the pupal stage, the ant will develop internal systems that will tell it whether it’s a worker, soldier, or queen ant. Most of the male ants will become soldiers, sometimes called warriors. And most of the females will become workers; these ants hatch without wings. A few females will be ready to be queen ants; they’ll be born with wings.

Soldier ants act as warriors or defense. They will also mate with the queen. These ants only live from a few days to a few weeks, and they will die shortly after mating.

Worker ants are sterile females. They can live for several years, between five and seven if they are able to avoid predators and other dangers. The exception would be if the queen were to die; worker ants will die off fairly quickly, within weeks to months, if the queen dies.

A healthy queen can live for 15 years or even more, assuming she’s well taken care of and protected from predators. In captivity, some queens have even lived for over 20 years. Her primary role is to lay eggs and ensure the longevity of the colony, so the worker and soldier ants will do what it takes to protect her.

Factors That Affect Ant Longevity

There are a lot of factors that can affect the longevity of an individual ant as well as that of a colony. Here are some of them:

  • Temperature and humidity. Ants are cold-blooded, so the outside temperature affects their body temperatures and metabolisms. In warmer climates, ants can have a higher metabolism, which leads to a shorter lifespan, while in cooler climates, their metabolism can slow down, leading to a longer life. Humidity is beneficial to ants and can help them enjoy longer lives, while dry or arid climates can lead to dehydration and shorten their lives.
  • Food availability. Access to a consistent diet is, of course, necessary to keep the colony living a long, healthy life. Ants forage and aren’t generally picky eaters, so if the environment has organic material, it’s likely the ants will be well-fed. On the other hand, if there is a food shortage, the ants might die out, particularly in the winter when resources in most places aren’t bountiful.
  • Predators. Ants build intricate nests under the ground, and this keeps them safe from many predators. If they do encounter a predator, though, it’s possible the whole colony can suffer a great loss, even if the whole thing isn’t lost. Humans are considered a predator and can wipe out nests indoors and outdoors with chemicals and other extermination/control methods.
  • Nest quality. The quality of an ant nest can make or break their lifespans. If the nest isn’t well-constructed and doesn’t provide shelter from weather or doesn’t protect from predators, that will negatively impact the colony’s lifespan. On the other hand, ants that have well-built, sturdy nests are likely to have longer lives.

When thinking about ant lifespans, it’s important to understand that these are all averages, and that different species have various lengths of life. In addition, the factors listed can have small or large impacts on their longevity. If you’re dealing with ants in your house, you probably aren’t going to be able to wait out a colony, so it’s important to get on top of your ant removal methods sooner rather than later.

Exploring the Fascinating World of Crickets

If you were to think about crickets, you might think about the music they make at night. Or, you might think about Jiminy Cricket. There’s a lot more to these interesting creatures than meets the eye (or ear, in this case), though. Let’s delve into the intriguing world of crickets and uncover some lesser-known facts. We’ll talk about topics including:

  • Why crickets chirp and what influences their patterns
  • How crickets keep themselves at the right temperature
  • The environmental and nutritional impacts of crickets as cuisine
  • All about the cricket’s sense of hearing
  • Crickets in mythology and popular culture

Let’s get started and take a deep dive into the fascinating world of crickets!

Cricket Chirps as Communication

While it might just sound like a beautiful summer song, that familiar chirping is more than that. Male crickets create their characteristic chirps by rubbing their wings together in a behavior called stridulation. They do this to woo female crickets for mating.

If you listen carefully on a warm evening, you’ll likely hear lots of different cadences, tones, and volumes. Each cricket species (and there are a lot of them!) has its own special song, and the speed of chirping is often influenced by the weather. On hot evenings, the songs will have a faster tempo, and on cooler evenings, the chirps will have more pauses. Other factors that can affect their chirp rate are how old the cricket is, how much competition the males have, and whether they’re hungry.

Cricket Thermoregulation

One reason for the different speeds of chirping is that crickets are cold-blooded, which means they have to regulate their body temperatures depending on the environment. During the day, they might bask in the sun to warm up. At night, they cool down along with the ambient temperature.

Many times, crickets will die over the winter, but some will find sheltered places, such as inside a toasty warm home, to ride out the colder months. Crickets can also go into a state called torpor, which is similar to hibernation.

Crickets as Cuisine

You might not want to sit down with a large plate of crickets at dinnertime, but these insects are a source of nutrition. They’re chock-full of protein and vitamins, and they don’t need as much space, water, or resources as other types of livestock that you might eat on a regular basis, like cows, pigs, or chickens.

Cricket farming has become more popular in recent years, and they just might become the next protein trend. It could help tackle the problem of food insecurity, too. If you’re open to it and you have a source of edible crickets, consider giving them a try!

Extraordinary Hearing Abilities

Another fun fact about crickets is that they hear through their knees. Their ears are located on their forelegs, and they detect sound waves by picking up on the vibrations they make. Crickets can sense you or other potential predators approaching thanks to these vibrations.

In some crickets, one ear is larger than the other, and that allows them to determine more easily from which direction a sound is coming from.

Cultural Significance

Aside from Jiminy Cricket, these little creatures have found their way into various stories, myths, folklore, and types of symbolism. In some cultures, such as in China, crickets are considered good-luck symbols that can protect against evil and bring prosperity.

Crickets are also part of popular culture. In the Disney film, Mulan, Cri-Kee is the princess’s lucky cricket who warns her of danger and watches over Mulan. Jiminy Cricket himself is also a kind, caring, and brave friend to his sidekick, Pinocchio.

To you, crickets might be a household pest or a welcome musician of the night. Within their groups, however, crickets have complex behaviors and unique adaptations that have inspired fascination to the point that now they have some cultural significance.